


Another boot cover for my Yang Xiao Long Cosplay. I actually intended to buy a pair from a bargain shop but I couldn't find anything close and cheap enough so it's time for another DIY project.
- a pair of non-wedge, heeled shoes(non heeled shoes will work as well but this tutorial will be working on a heeled one)
- socks
- non-stretch fabric
- interfacing
- 2 separating zippers
- snap buttons(the one where you can sew in)
First of all, I wanted the shoes to be as close to the fabric color as possible since the heels will be showing so I butchered my old pair of low-cut boots. If you already have shoes similar to the one on the right then you're good to go.

Cut a small hole on the socks' heels enough for the shoe heel to pass through. A tiny snip will do. It'll stretch once you fit the shoe in. Then gradually widen if it's still too small. This will serve as the base and even out the surface of your feet on the shoe.

With the socked shoe on, trace a pattern for the lower part of the boot cover. From the bottom of the shoe (heel excluded) up to at least 3-5" above the ankle. Do this while sitting on the floor, feet on top of the pattern paper and lying on its side. Leave about 1-1.5 inches allowance around the trace.

Transfer the pattern into the fabric and cut two pairs. Don't forget to put additional seam allowance aside from the added 1"-1.5" extra.

With wrong sides facing away from each other, sew as indicated below.
(B) is the height of the back of your base shoe, excluding the heels.
(B) is the height of the back of your base shoe, excluding the heels.

With wrong side out, fit the shoe in. Cut a rectangular piece of fabric wide enough for the bottom of the shoe. Hold it in place with a running stitch(use a bright-colored thread) which will also serve as your guide when you sew it later. No need to be neat with it, you can pull them out later after you're all done. This method works better than pinning as it doesn't get in the way when you properly sew it later.

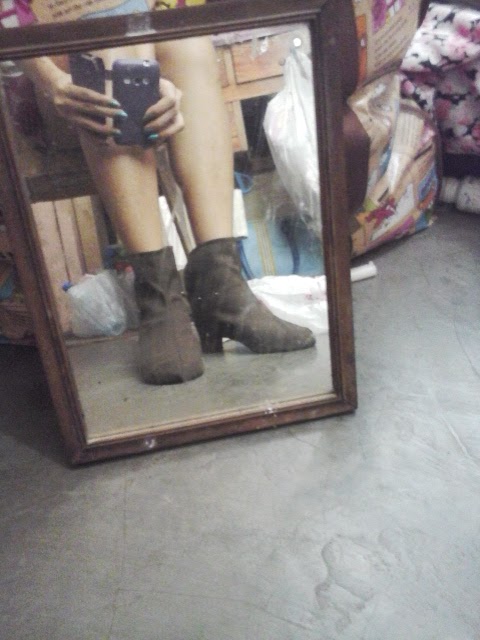
Hem all exposed edges. Once you're done, turn right side out. You might also want to switch the left and right parts as they're flipped inside out now, mark it down so you won't be confused later. Fit the sock-covered shoe in. It should look something like below.

Also, I recommend to put an additional protection underneath to protect the fabric from tearing out (like the one I did from my other bootcover) especially if you're going to walk on a rough/rocky ground. I didn't have any on this one because I ran out of time and it's a mall event anyway but will probably add in the future.
(When wearing, the covers should already be on before you slip in your foot. Because we're using a non-stretch cover, you'll be having a hard time if you slip your foot in the shoe first before putting the covers)
 |
| looks just as fine when left like this |
Next will be the pattern for the upper cover.
First, take the necessary measurements (make sure you add at least two fingers allowance when measuring circumference):
- Upper circumference
- ankle circumference
- length (distance from upper to to ankle circumference)
 |
| sorry for crappy handwriting *cri |
You can actually go ahead with just a one-piece pattern but i wanted to have a back seam hence the cut. Make sure you have an additional 0.5-1cm seam allowance on the side where you'll be connecting the two pieces together.

Transfer the patterns into the fabric and make two pieces of each. Position the interfacing above or below but not in between the two same patterns. Sew around except the top part.
Turn the entire thing inside out. Press the edges and sew around it again also excluding the top part. Connect the two pieces together and iron to flatten the seams.
Attach the separating zippers on each side and then sew in the snaps just like in the image below. I sewed them through the inner fabric only so that the stitches will not be seen on the outside.

Once that was done, try the entire thing on and marked where the other pair of the snaps would go then sew them in. These would lock the two pieces securely together.

I also made a pair of little strips(2cm-wide bottom, 1.5cm-wide top & 2in long) same method with the top cover. I attached it on the ankle part to hide the little gaping hole that peeks through whenever you walk because of its open back. It also locks to the top piece with a snap button.
Finally, hem the top part. It's going to be quite thick because of the interfacing so there might be some parts where you just have to hand-sew.
That's basically done. You already have a generic-looking boots which can be used into various cosplays. However I wanted to add more details to mine to make it a tad bit closer to Yang's boots so I added an interfaced strip across the front.

No comments:
Post a Comment